Showing posts with label how-to. Show all posts

Saturday, April 21, 2012

How to clean OSX (remove temp files and speedup your mac)

Clear OSX Space


The following set of procedures free some unnecessary files from your OSX drive and free space, also it sometimes help to fix slowness problems, but please be very very careful with the "sudo rm -f" command it is very dangerous so make sure you type it correctly.

Run cron tasks now

sudo periodic daily weekly monthly
Delete logs from your home folder
cd ~/Library/Logs
sudo rm -rf ~/Library/Logs/*
Delete cache from your home folder
rm -rf ~/Library/Safari/Downloads.plist
cd ~/Library/Caches
sudo rm -rf ~/Library/Caches/*
Flush Directory Service resolver cache (DNS, etc)
dscacheutil -flushcache
Update application pre-binding
sudo update_prebinding -root / -force
Repair disk permissions on boot volume
sudo diskutil repairPermissions /
Clear the global cache database
cd /Library/Caches
sudo rm -rf /Library/Caches/*
Flush system cache entries
cd /System/Library/Caches
sudo rm -rf /System/Library/Caches/*
Flush LaunchServices Database (helps with multiple "Open With" entries)
/System/Library/Frameworks/CoreServices.framework/Frameworks/LaunchServices.framework/Support/lsregister -kill -r -domain local -domain system -domain user
Flush Apple Type Server (ATS) cache (resolves issues with corrupt fonts some times)
sudo rm -rf `lsof | grep com.apple.ATS/annex.aux \
| grep Finder | cut -c 66-139`
sudo rm -rf /private/var/folders/*/*/-Caches-/com.apple.ATS
Repair disk permissions on boot volume
sudo diskutil repairPermissions /
restart your OSX and enjoy a cleaner and more free space on your OSX

Shay.BC.

Saturday, November 1, 2008

Still waiting for root device II


This post is a continue part of my previouse "Still waiting for root device" post that covered several solutions including:

  • use RD=DiskXsY darwin switch
  • BIOS configuration
  • flag OSX86 partition as bootable

this post will display more good options to get pass this error, starting with the simplest:


1. Download another distribution
the simplest solution is sometimes the less obviouse, although you probably thinking "what good can another copy of Hackintosh do for my hardware compatability error?" well the thing is that OSX86 is a shrinked OSX with hacked, tweaked, opensource drivers for a PC, this what makes you PC compatible with OSX, one distribution does not include the same drivers as the other, also versions of the same published contains different drivers, for instamce Leo4All_v2 may work on your machine but Leo4All_v3 might not. so be sure to download as much distributions you can until your problem is solved.


2. Plug USB/Firewire drive (even DiskOnKey)
another simple solution is to plug an external drive like a USB or Firewire drive or even a USB DiskOnKey (size doesn't matter, in this case anyway) in your USB port and reboot the system, with the Hackintosh OSX86 DVD in the DVD drive, once the darwin countdown appear press F8 in order to get the boot prompt and use the RD=DiskXsY switch (switch use is explained in this post in greater details) and point the disk number and partition number to the external drive. this solution is only to get the installtion started, not a permanent solution, after the installation is running you can choose different combination of drivers until the installed system will load without the need to use the USB plug trick.


3. Use External DVD
if you can access external DVD drive or a SATA drive then try using it, most of the times the problem is hardware inconsistency with the driver installed on the DVD, this means that you might have a DVD that the booting driver set (this set is different then the driver it contains in order to install on your system) includes SATA harddrive driver, and your harddrive might be SATA but the DVD is IDE, and ofcource it can be vice versa, that the HD is IDE and the DVD is SATA and driver is one of them (IDE/SATA), so try to make it consistent, use the same HD and DVD type (even by plugging external DVD so it will be USB instaed of SATA or IDE) and find a distribution that will load them.


4. Play with Master/Slave settings
sometimes when your PC contains IDE hraddrive and IDE DVD you need to play with the master slave configuration (use this option only if you know what it means, this option involve openning the PC case and play with harddrive/DVD jumpers)


5. More darwin swiches to try
there are more swich you can try beside rd=diskXsY, you can read about them in this post, try these next swiches: platform=X86PC -x -f cpus=1, try them in different combinations until you succeed.


6. Create an HFS+ partition prior to the installation
if the installation cannot find your root device although you tried previouse sulutions then try creating an HFS+ partition and point to it using the rd=diskXsY at boot time.


from windows create a partition of AF type (HFS+ type), do it like this:

  • from windows press Start->run and write: cmd and press enter
  • write diskpart and press enter

  • write: list disk (it will display all available HD)

  • select the number of the one you want to install Leopard on like this: write: select disk NUM_OF_DISK and press enter (replace NUM_OF_DISK with the number of the disk you want)

  • next write: list partition and press enter

  • it will display all the partitions on that disk, now delete the partition you planed to install on like this: delete part NUM_OF_PART and press enter (replace NUM_OF_PART with the partition you wanted to install leopard on), if you don't have such partition then skip to the next part

  • create a partition of the AF type like this: write: create partition primary id=AF and press enter

  • write: active and press enter

  • reboot and try to load the installation from the DVD again

7. Copy the Extensions folder from DVD to the Harddrive
this solution is for all of you that got the "Still waiting" error after the installation processed finished and first reboot occurred. if this is your case then it means that you have succeeded to boot into the DVD inorder to install (so the correct drivers for your system reside in the DVD boot extensions folder) but when you finished installing the drivers you selected they just won't boot and the Still waiting for root device appears, then all you have to do is to copy the DVD boot extensions folder into your installed copy and by that boot from your harddrive using the DVD drivers, do it like this:


boot from the install DVD, from utilities menu item select the terminal and write the following commands, but replace the word Leopard with your installation partition name (you set it during installation):
cd /System/Library
mv /Volumes/Leopard/System/Library/Extensions /Volumes/Leopard/System/Library/Extensions.bak
cp -R Extensions /Volumes/Leopard/System/Library
cd /Volumes/Leopard/System/Library
chmod -R 755 Extensions
chown -R 0:0 Extensions

after this the system should be able to boot on its own, you may need to flag the partition as bootable read how to do this here.


8. Change the ATA driver on the DVD
this last suggestion is very good but very hard to nail. it involves hacking the IOATAFamily.kext. this is the kext that is responsible for the attached hardware on your machine (ATA= AT Attachments, SATA = Serial ATA) like IDE hard drives or CD/DVD we will insert your controller Vendor ID and Device ID to it. follow these instructions:


  • boot into windows

  • open control panel

  • find your Disk controller

  • right click and choose properties

  • chose the Details tab

  • the first line contains something like this: PCI\VEN_30BE&DEV_004A...

  • Vendor id is the 4 characters after the word: VEN_

  • Device id is the 4 characters after the word: DEV_

  • write on a paper the sting like this: 0x + VendorID + DeviceID (without plus or space for instance this example should be like this: 0x30BE004A)

  • next stage involve using MacDrive and some util that will mount your install DVD ISO file (like alcohol), you need to mount the DVD after installing MacDrive that allows you to access Mac file system,

  • cd into the folder:

  • make sure you have at least these folders in there: AppleGenericPCATA.kext AppleOnboardPCATA.kext IOATAPIProtocolTransport.kext AppleIntelPIIXATA.kext AppleVIAATA.kext AppleNForceATA.kext IOATABlockStorage.kext

  • also make sure you have the folder: /System/Library/Extensions/JMicronATA.kext (if you use a JMicron controller and IDE hard drive)

  • next open in an editor the file: /System/Library/Extensions/IOATAFamily.kext/Contents/PlugIns/AppleVIAATA.kext/Contents/Info.plist

  • find this tag: <>IOPCIPrimaryMatch< /key >

  • after it you will find a tag: <> with allot of strings like you wrote on the paper in it.

  • add your string (one you wrote on the paper, but first make sure it is not already there, if it is - abort this step (Solution 8) completely) with a space between it to the others (location isn't matter as long as it is in the tag like the others)

  • save it

  • delete the file: /System/Library/Extensions.mkext

  • save the ISO file with these changes, burn it onto a DVD, boot from it with -F at the darwin prompt.

hope all these solutions help you,
ShayBC.


You might want to read these related posts:
Still waiting for root device
Darwin Boot Options
Download Hackintosh OS X Leopard
Blinking cursor after OSX86 install
Restore bootable partition

Tuesday, October 28, 2008

Make secondary install bootable


This post explain how to make a Leopard (hackintosh) secondary install bootable, any computers that has more then one OSX86 installd have a primary install and secondary install, a secondary install can be install on USB driver, Disk-On-Key, another partition, as long as you can boot more then one OSX86 on that computer, that means that you will load the working OSX86 and from there repair the non-bootable OSX.
for only and primary install read this post.

please note that this proccess will work for MBR and GUID partition scheme, if you don't know what this means, or want to learn how to check which of the two partition scheme you have then you can read this post.

in order to make your secondary partition bootable, please follow these next steps:
1. boot into your working OSX86 partition
2. download this file and extract it, for this post i will extract it in the root folder / so now i have a folder named: /MakeBootable
3. make sure you know what partition scheme you have (MBR or GUID)
4. open terminal (Applications->Utilities) and write the following commands
5. sudo -s (and write your password)
6. cd /MakeBootable (this is the folder you downloaded and extracted at step 2)
7. diskutil umount force /Volumes/Leopard (replace the word Leopard with your non-bootable drive name)

the result should look like this:

Volume Leopard on disk1s1 forced unmounted

if you don't know the name of the drive (that is non-bootable) then you can write this:
mount -t hfs

then you get a list of all known drives in your system the result should look like this:
/dev/disk0s2 on / (hfs, local, journaled)
/dev/disk1s1 on /Volumes/Leopard (hfs, local, journaled)

8. now write the command:
dd if=./mbr/boot1h of=/dev/rdiskXsY bs=512 count=1
(replace the letter X with your non-bootable drive number and the letter Y with your non-bootable partition number, in this example it will be: rdisk1s1)
also if you have MBR partition scheme then leave the word mbr as written in the example, if you have a GUID partition scheme then write guid instead of the mbr word then it should look like this: dd if=./guid/boot1h of=/dev/rdiskXsY bs=512 count=1

the result should look like this:
1+0 records in
1+0 records out
512 bytes transferred in 0.008498 secs (60250 bytes/sec)
9. write the command:
dd if=./mbr/boot0 of=/dev/diskX bs=400 count=1
(replace the letter X with the number of the non-bootable disk, in this example it will be 1 then for this example it should look like this: disk1)
also if you have MBR partition scheme then leave the word mbr as written in the example, if you have a GUID partition scheme then write guid instead of the mbr word then it should look like this: dd if=./guid/boot0 of=/dev/diskX bs=400 count=1

the result should look like this:
1+0 records in
1+0 records out
400 bytes transferred in 0.018606 secs (21498 bytes/sec)

10. write the command:
diskutil umount force /Volumes/Leopard
(replace the word Leopard with your non-bootable drive name)

the result should look like this:
Volume DiskOnKey on disk1s1 forced unmounted

11. write the command:
./startupfiletool -v /dev/diskXsY ./boot_v8
(replace the letter X with your non-bootable drive number and the letter Y with your non-bootable partition number, in this example it will be: disk1s1)

the result should look like this:
HFS+ filesystem detected
Looking for 1 word free
reading 4096,4096
Marking word 196
writing back 4096,4096
allocated blocks 32 at start 6272


now the disk should be bootable and should be able to boot on his own, you may do the steps in this post or this post as a completeing procedure in order to make sure that the OSX is the first partition to boot from.

Shay.

Sunday, October 19, 2008

Make primary install bootable


how to make a primary installation OSX partition bootable?
sometimes you are going to need a solution for a non bootable partition that was previousely bootable or after successful installation the partition remain non-bootable.

please note that the solution sugested here is for a primary installtion, which means it is for the main and only OSX installation on your computer and you have no way to boot into another OSX system. although it is possible to restore a secondary OSX installaion to be bootable again using this method, there is a simpler solution and it is described at this post.

primary installaion = the first and only OSX installation on your computer.
secondary installation = second (or greater) installation of OSX type (means you have more then one OSX installed on your computer) a disk-on-key/external USB/Firewire drive can be considered a secondary installation for this matter.

also note that this post is for MABR partition scheme (and not for GUID partition scheme). if you don't know what MBR or GUID partition scheme means then please read this post first.

in order to make an OSX86 partition bootable follow these next steps:
1. boot leopard DVD into Single Mode (you can red how to do that here)

2. type the next commands at the command line:
cd /usr/standalone/i386
ls


the result of these two lines should be a list displaying all the files in the i386 folder,
please make sure that at least these files exist:
boot0
boot1h
boot_v8
startupfiletool


if these files does not exist they can be copied from the installation DVD, in order to copy the files from the DVD use the method explained in this post. the files can also be downloaded from here.

3. if this is the case then type:
dd if=./boot1h of=/dev/rdiskXsY bs=512 count=1
(replace the X letter with the drive number that the OSX is installed on, the first drive is 0 the second is 1 and so on. replace the Y letter with the OSX partition number, the first partition is 1, the second partition is 2 etc. example: my computer has only one drive so my drive number is 0, and i have windows installed on the first partition and OSX on the second partition, so my OSX partition should be 2, therefor my parameter should be: rdisk0S2)

you should see an output result similar to this:
1+0 records in
1+0 records out
512 bytes transferred in 0.008498 secs (60250 bytes/sec)


4. now type this command:
dd if=./boot0 of=/dev/diskX bs=400 count=1
(replace the X letter with the OSX drive number, first drive is 0, second drive is 1 etc. also please note that it is diskX and not rdiskX as the previouse command)

you should see an output result similar to this:
1+0 records in
1+0 records out
400 bytes transferred in 0.018606 secs (21498 bytes/sec)


5. type in the next command:
./startupfiletool -v /dev/diskXsY ./boot_v8
(replace the X with the number of the OSX drive and Y with the number of the OSX partition)

you should see an output result similar to this:
HFS+ filesystem detected
Looking for 1 word free
reading 4096,4096
reading 8192,4096
reading 12288,4096
Marking word 510
writing back 1288,4096
allocated blocks 32 at start 81856


now the disk should be bootable and should be able to boot on his own, you may do the steps in this post or this post as a completeing procedure in order to make sure that the OSX is the first partition to boot from.

Shay.

Thursday, July 3, 2008

Install Package from terminal

this post will explain how to install packages from command-line interface (terminal or Single User mode),

where to get packages?
first thing you need to do is get the package, if you have downloaded it then cd to its location for instance:
cd /Users/shay/Downloads
if you have it only in the leopard install dvd then cd to the packages location like this:
cd /Volumes/Leo4Allv3-10.5.2/System/Installation/Packages
Note: your dvd name will probably be different then "Leo4Allv3-10.5.2"

next you should create a temp folder where you can work at:
mkdir /mytemp
and copy the desired packages to there:
cp -R powermanagement.pkg
and move to the folder (so each command you execute will be executed in relative to that folder):
cd /mytemp

what is a package?
a package is a compressed file or folder (can come in two forms), that can be executed due to its extensions pkg.
after execution a graphical installer will be launched and after several clicks a script will install files and folders into your hackintosh/Mac system.

how to extract package?
the package file can be extracted into a folder form using a command line tool named pkgutil,
you can check if your package is a flat file package or a directory package like this:
try to: "cd powermanagement.pkg"
if the result is: "-bash: cd: powermanagement.pkg: Not a directory"
then you are dealing with flat file, in order to install it from command line you need the folder form so lets convert it to a folder form, you do it like this:

pkgutil --expand powermanagement.pkg powermanagement_ex.pkg

so now you may "cd powermanagement_ex.pkg" successfully.

what's inside a package?
if you look inside the pkg folder (from finder right click and choose "Show Package Contents") or from command line using the cd command you will find the next folder structure:


the most important files are:
Archive.bom - this file contains information of what is the content of the package, where it should be installed, etc.
Archive.pax.gz - this is the actual content of the package zipped (this is where we are heading)

you may sometimes find in folder Resources a shell scripts that should be run pre install and post install these scripts handle creation of folders, deleting temp files, fix permissions etc.

how to extract package content?
you can expand the Archive.pax.gz in order to get the files and copy them to the destination folder manually (and by that install the package) like this:

(the first cd command is adviced so files and folder extracted will not overwrite existing system files and folder, ofcource you may want to create a new folder and cd to it instead of the myTemp folder)

cd /mytemp
gzip -d powermanagement_ex.pkg/Contents/Archive.pax.gz
pax -r '*' <>

the result will be the contents of the package sorted in the destination folders at the current directory, in this example:


how to manually install the package?
after extracting the content you need to copy each file to its destination,
this package for instance, have System as root of files meaning the kext files should be on your hard drive at /System/Library/Extensions etc.
the simplest way to "install them will be to copy the whole tree like this:

cp -R /mytemp/System /

this will tell leopard to copy the current folder System into the root (so if it exist it will populate it if not it will be copied)

last thing to do is to go over the post install script and see if there are other actions need to be taken as part of the install process, display the content of the script like this:

cat powermanagement_ex.pkg/Contents/Resources/postinstall | more

in this case the script will look like this:

so in this case we need to copy the files to system (we already done that), and fix permissions, a faster way will be to do this:
chmod -R 755 /System/Library/Extensions
chown -R 0:0 /System/Library/Extensions

or even safer like this:
diskutil repairPermissions /System/Library/Extensions

Summary
so lets go over the commands we need to do in order to install powermanagement.pkg from command line:
cd /Volumes/Leo4Allv3-10.5.2/System/Installation/Packages
mkdir /mytemp
cp -R powermanagement.pkg
cd /mytemp
pkgutil --expand powermanagement.pkg powermanagement_ex.pkg
gzip -d powermanagement_ex.pkg/Contents/Archive.pax.gz
pax -r '*' <>always use pacifist or packageutil or simply double click the pkg file if you are in GUI in order to install the package.

is there a difference between manual install and GUI automatic install?
yes, during GUI install the installed package is registered in mac install database and a receipt is kept there with the information of the installed files, location etc. this info may come handy when you want to reinstall, uninstall, or verify that the install is intact.

more then that most install create backup and allow uninstall feature in a later time, although you can do backup, a complex install makes uninstall process almost impossible.

Shay.

Tuesday, May 13, 2008

How to Connect to Windows Share


this is a quick How-To connect to a share on a remote windows computer,

there are several ways to do everything, i hope some of you will post some comments and share your tips as well.

actually this trick works not just for windows computers, you can use this method in order to connect to any smb share (Mac, Linux, Solaris, Unix, Novel, Windows).

first we have to enable the smb protocol on the destination PC. click on the link in order to read how it is done on a Windows PC.

in order to connect to a remote computer (windows) do this:
1. from "Finder" Go menu select: "Connect to Server"

2. a "Connect to Server" dialog appears

3. at the "Server Address" write: smb://SERVER_NAME/SHARE where SERVER_NAME should be replaced with the server name you want to connect to, and SHARE should be replaced with  the share name you want to access.

4. press "Connect" and a connect progress dialog appears

5. if you did not specify a SHARE, then a share list appear waiting for you to select a share.

6. select  a share and press "OK".

7. an icon of that share will appear on your desktop.

from this point on you treat this disk like any other DMG/Cd/DVD/USB Disk, if you have enough permissions you can write, delete, change, etc. to disconnect simply drag it to the trash.

Enjoy.

Wednesday, May 7, 2008

How to Access OSX drives from Windows


If you have a disk or partition of windows that you boot from and you need to access your files (images, music, movies, etc.) on the Leopard or any other OSX drive then read on.

for this purpose you need to use MacDrive application, this application is installed on windows and can display Macintosh Hard Drives inside "My Computer" as if they are normal windows partitions, you can read, write, change and even delete files if you must.

the installation is very simple (next,next,next), and after it is done you reboot and you can access your OSX drives from the hackintosh dual boot, or from USB external Time-Machine.

1. download MacDrive
2. from windows install MacDrive
3. reboot into windows (make sure Mac drives are connected)

thats it, the MacDrives will be marked with a special icon indicating they are Mac and not simple windows HD.
after the install "My Computer" should looks like this:


Enjoy.

How to Access NTFS (R/W access) from OSX


this post is written due to a readers question (i added the email and the response as a comment to this post),
he was having problems writing to NTFS (Windows Hard Drives), if you have dual boot or connecting USB Hard Drives that have NTFS File System and want to access it from within OSX for writing purposes then read on.

if the HD is plugged or mounted after the system has loaded (for instance a USB disk on key) then you get a read/write access and can do whatever you wish to that USB Flash Drive.

but if you have a Disk connected and already have an NTFS file system on it then it will be auto mounted at boot time but it will give you read only access. for instance i have a vista partition dual booting with OSX and from within OSX it looks like this:


so what you need to do is to install two simple utilities:
MacFUSE (Mac File-System User-Space) it support the file system of many kind in a kernel-level so they integrate from the OSX almost natively.
NTFS-3G a driver that support the linux FUSE spec and can be run on-top of the MacFUSE Plugin and support the NTFS from within Mac OSX.

the steps are very easy:
1. download MacFUSE
2. run MacFUSE Core.pkg
3. download NTFS-3g (make sure to download the "Mac OS X DMG Package")
4. mount the DMG file
5. run NTFS-3G.pkg
6. restart

thats it, the final result should look like any other drive like this:


if you would like to uninstall NTFS-3G follow these steps:

  1. from the NTFS-3g DMG execute the script: "Uninstall NTFS-3G.command"
  2. press "Open" on the appearing popup
  3. in the terminal that appear enter your password and press enter
  4. wait until this message appears: [Process completed] and then you can close the terminal
if you would like to uninstall MacFUSE follow these steps:
  1. open a new terminal and write: sudo -s (and press enter)
  2. enter your password and press enter
  3. paste these two lines and press enter after each one of them
  4. lsbom -fls /Library/Receipts/MacFUSE\ Core.pkg/Contents/Archive.bom | colrm 1 1 | xargs rm -v
  5. rm -rv /Library/Receipts/MacFUSE\ Core.pkg
  6. reboot
your computer will come up without NTFS-3G and without MacFUSE.

here are the Install screenshots in case you need them:

MacFuse Install Screen Shots:


and the NTFS-3G Install Screenshots:


Enjoy.

Monday, April 14, 2008

Make XP look like Mac

Have you ever wanted to make your XP (or Vista) look like a mac?
this post will explain how to dress XP up so it will look and partially behave (not really) like a mac.

the reason i wanted to do that is: i wanted to enjoy the beauty of mac on my XP at work, unfortunately i couldn't convinced my boss that Mac is the correct platform for development :-)

Change the Boot Screen
so first things first, lets change the first screen we see when we launch the XP/vista the boot screen. in order to do that we need to download the application that replace it, and the Apple boot screen:

  1. Stardock BootSkin
  2. Apple Boot Screen for XP
the result of the boot screen looks like this:
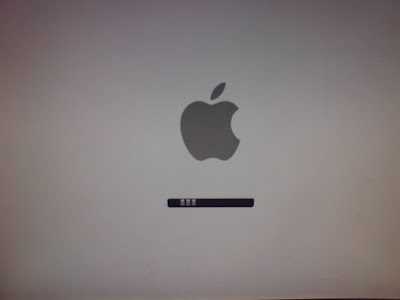
Granted its not a mac with the round circle but its better then XP boot screen.

Change Logon Screen
next thing you would like to change is the Logon Screen, this also done using Stardock utility, note that this is a Tiger logon screen, but i guess you can create easily a leopard logon screen, you can download it here:

  1. Stardock LogonStudio (for XP or Vista)
  2. Mac Tiger Logon screen

Here is how it looks on my XP:


Change Explorer to Finder (overall look and feel)
next part i wanted Explorer to look like Finder, and start menu bar like leopard menu bar, there are several ways to achieve that, the most popular is Windows Blinds again a Stardock product, but fortunately there is also a free option called FlyAKiteOSX (this one is actually taking care of everything logon screen, logoff screen, explorer, start menu etc. but as Tiger)

  1. FlyAKiteOSX home page (you got to see this site)
  2. Stardock WindowsBlinds (change the visual style of Windows XP)
  3. A Full Leopard Visual Style for WindowsBlinds
  4. Mac OSX Tiger Skin for WindowsBlinds
  5. and another skin of Tiger for WindowsBlinds (better one IMHO)

Here is the WindowsBlinds Configuration Window: (at the bottom you see the available visual style and a preview in the middle)
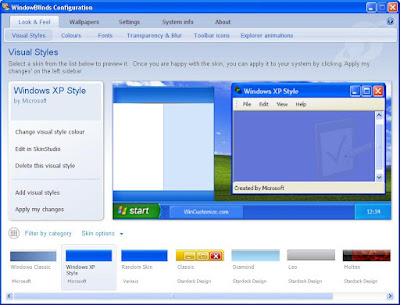
After you download the skin, you can import it using the "Add Visual Styles" button on the left, and after choosing the style press "Apply my changed" button on the left.

Install Apple Applications
next you would like to do (even if you will not change anything) you got to download the apple Safari browser and iTunes music player, beside making it more apple like OS these are very good (free) products that apple released for the Windows environments, they are not as good as on the mac (far from it) but still windows boring UI get some Mac injection of beauty. also if you would like to have a program like iPhoto then you should download Google's Picasa (if you haven't already)

  1. Apple Safari
  2. Apple iTunes
  3. Apple QuickTime
  4. Google Picasa


Change Icons and Wallpaper
the obvious part is the leopard or tiger wallpaper that will complement the windows rigged OS, and a set of icons to replace "My Computer", folder, Control Panel etc. icons. if you are using FlyAKiteOSX that will make a complete makeover to your windows and you will not need any thing else (for a tiger look and feel), but if you have decided to try to achieve the full leopard look and feel then you will need Stardock IconPackager that will allow you to change every icon on windows.

  1. Stardock IconPackager
  2. Leopard Wallpapers
  3. Leopard Icons pack (press the Download link from the upper menu)
  4. Another Leopard Icon Pack (better one)
Sorry but didn't made screenshots for this part.

Install Leopard 3d Dock
Last but certainly not least, the Dock, what Leopard Mock up can be complete without a shiny sexy 3D dock. also here there is an option from Stardock named ObjectDock, but i think that the free RKLauncher is by far more beautiful and if you get the iVista version (yea, yea get that one) of RKLauncher you get the Grid and Fan Stacks like.


  1. Stardock ObjectDock (nice, have a free version and a leopard 3D look as well but no stacks)
  2. RKLauncher (O' Natural)
  3. RKLauncher iVista version (get this one! in order to download press the image, and there is a video displaying the Dock behavior)
here are my screenshots Dock:


Fan (note the Drawers icons):
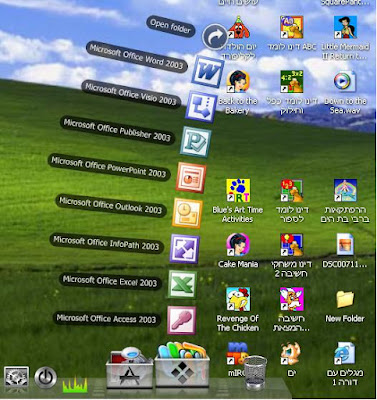

Grid stack (the stack background is transparent just like in leopard):


Add Expose and Spaces
lastly we need to add some behavior and to invest a little in the feel and not just in the look,
there are two more additions i used: one is the Expose like for windows and the other is the Spaces like for windows.
now this one was a little hard to choose since there are a lot of them, but i will not include all of them, but here are some i tried:
Expose:

Spaces:

Add Dashboard
download and install one of the many dashboard like applications, there is the Google Desktop that displays the gadgates on a SideBar and you can drag the gadgates out of the sidebar to anywhere on the screen (and auto hide the SideBar). but it will not allow you to hide them all and display all on demand using a hotkey, only from the tray icon or sidebar

this is where the Yahoo! Widgets come in to the game, it displays the widgets in a SideBar (optioanl) that shrinks down when idle, and can be removed or auto hide, the widgets also display on the desktop and can be right cliced->hide and revealed when moving to "Heads Up" mode, you can right click the side bar or tray icon and select "Heads Up" or you can use the HotKey associated with This mode. this mode show all the hidden widgets at once and darken the screen just like in OSX (no kinky animation but stil...), just dont forget to choose "" from options so the blue background will disappear and replaced with the darker glass. (see the screenshots and movie at the end of this post). another cool faeture is that it can put widgets in 3 modes:

1. normal like any other window
2. always on top (always show the window in the foreground on top of other windows)
3. always in the back (as if it lives on the desktop)

Dashboard:


another application i suggest to use is "TransBar" which allows you to make the XP bar transparent, this way you can edit your wallpaper to display the OSX bar and when clicking on the apple - the start menu appear (tacky i know)

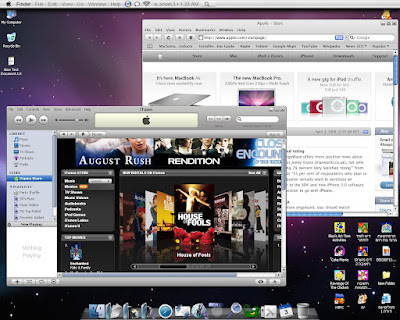
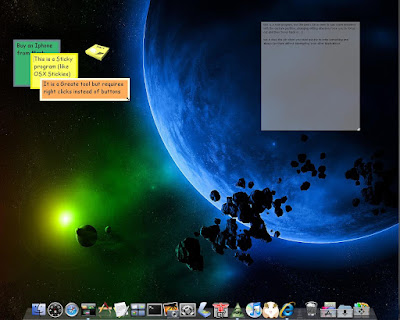
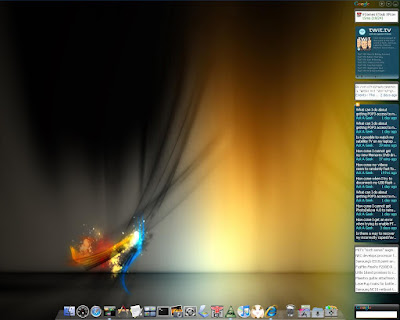
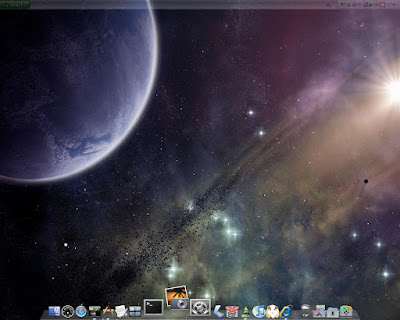
and here are some screenshots of the end results:
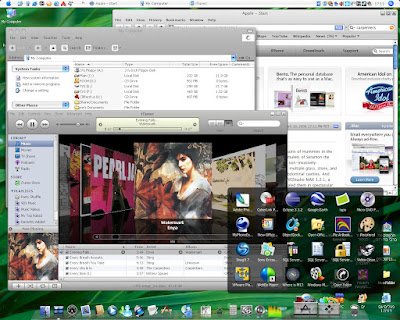


Enjoy.

Sunday, April 13, 2008

PS2 doesn't work after 10.5.2 update


this is another thing that didn't work for me after updating to 10.5.2 on several computers, and several installations including laptop trackpad,

the solution is fairly easy, you need to restore your ApplePS2Controller and AppleACPIPlatform kext (Kernel Extensions).

so the first thing you need to have is the 10.5.1 kext here are links (in case you didn't back it up):
AppleACPIPlatform.kext
ApplePS2Controller.kext

the way to restore them is from the command line:

  1. open terminal and write these commands:
  2. sudo -s (press enter and write your password and press enter again)
  3. mv /System/Library/Extensions/ApplePS2Controller.kext /System/Library/Extensions/ApplePS2Controller.kext.10.5.2
  4. mv /Extensions/AppleACPIPlatform.kext /Extensions/AppleACPIPlatform.kext.10.5.2
  5. these commands will backup your current 10.5.2 kext, just in case
  6. next copy the 10.5.1 kext and set their premissions like this:
  7. cp -R /ExtensionsBackup/ApplePS2Controller.kext /System/Library/Extensions
  8. chmod -R 755 /Extensions/ApplePS2Controller.kext
  9. chown -R 0:0 /Extensions/ApplePS2Controller.kext
  10. cp -R /ExtensionsBackup/AppleACPIPlatform.kext /System/Library/Extensions
  11. chmod -R 755 /System/Library/Extensions/AppleACPIPlatform.kext
  12. chown -R 0:0 /System/Library/Extensions/AppleACPIPlatform.kext
  13. Reboot
that's it, if you are suffering from any problem please post comments on this post.

Enjoy.

Friday, April 11, 2008

Restore bootable partition

You have recently installed kext, application, update, another OS on a different partition and after boot all you get is a blinking cursor, and no darwin boot, and system not booting.

this post will explain step by step how to turn your partition back to a bootable state.

Data you should know.
you need to know what are you hard disk and partitions configuration,
  • how many drives do you have
  • how many partition on each drive
  • what OS and File System is installed on each Partition
  • what OS you would like to restore as primary boot loader
Solution 1:
first solution is accomplished using the "GNU Gparted Live CD", it is free Linux based application, you can download it here as an ISO file, you need to burn the iso file on to a CD and boot from it.

once you boot from the Live Cd you see this screen:


in the upper graphic parts you see square shapes that each represent a partition, above them there is a drop down that display the currently selected hard drive (in this case hda and its size is 37G), in linux (as in mac) drive is represented as file under folder dev, so the first drive is: /dev/hda.

if you choose from the drop down another driver it will display that drives partitions.
the lower table display the partitions in more details, you can see in this example that the first partition is NTFS, and it has the boot flag marked, that means that the NT file system will be booted from.

one of the thing you can do, is set a partition to being a bootable by setting the boot flag to it. you do that by right clicking with the mouse on the desired partition and choosing "manage flags" , from the pop up window check the boot flag check-box, close the window and click the "Apply Changes" button after it finish, reboot, and your HFS+ file system should be bootable again.

Solution 2:
there is another option to do this from command line using the fdisk utility available from the leopard DVD.
steps:
  1. insert the Leopard install DVD and boot from it
  2. at boot time press F8, and you will see the darwin boot screen
  3. write -s and press enter this will enter "Single User" mode
  4. execute the two lines that appear there regarding fsck and mount as described in the "Single User" post.
  5. next enter these commands:
fdisk -e /dev/rdiskX (where X stands for your leopard install hard disk number (first one is 0 second is 1 etc.))
then in the fdisk utility write ? for list of commands (help screen)


write p (short for print) and press enter then it will display a table of disks and partitions
find your HFS+ partition and remember its number (if it is the first partition it will be 1)
next write: f X where X stands for the HFS+ partition probably 1 if it is the first partition,
next write: u (short for update) and press enter
then write: w (short for write) and press enter
lastly press q (quit)
then restart and the HFS+ partition should be bootable again.

so for summary, the commands should look like this:
boot single mode (after restart press F8, at the prompt write -s and press enter)
/usr/sbin/fdisk -e /dev/rdisk0
f 1
u
w
q
Reboot

if these solutions did not help that means one of two things:
  1. you have just installed Leopard and did not install Darwin as described in the "Install Leopard" post.
  2. or for some reason your partition ID has changed from AF to something else causing the HFS+ file system to recognized incorrectly.
the first case is solved by simply installing the darwin from the DVD.
the second case can be solved from the fdisk utility instructions in this post.

Enjoy.

(All About) Boot into Single User


What is "Single User"?
"Single User" is a boot mode, you actually tells the unix shell that the OS should load only prompt (no GUI), and the local console login is the only login available (can't be logged on from the network),

Why would you like to do that?
sometimes the system requires an administrative actions by the administrator, such as disk checkup, partition altering, drivers uninstalling, backups, etc.
at this delicate tasks you don't want other users to touch/create/remove/use files, hardware, CPU, and use resources. this is why you enter into single user mode.

What can you do in "Single User" Mode?
since single user mode is for administrator and no GUI is available then every task you can do from terminal (command line) as root user you can do here, which is practically everything (on the current system) it wasn't meant to be used for regular work such as surfing the web (there is no network) or reading files etc. you can use all the unix commands available for OS X and all the command line utilities and applications available on that machine.

How to enter Single User Mode?
  1. Restart your computer
  2. Continuously press F8 until you see the Darwin boot prompt
  3. write "-s" without the quotation marks and press enter (for real mac do this instead)
  4. you will soon reach a prompt
  5. note the lines written to the console about fsck and mount
  6. write: /sbin/fsck -fy
  7. press enter and then the system should write:
    ** The volume XXX appears to be OK
    or
    ***** FILE SYSTEM WAS MODIFIED *****
    if it is the second option, then repeat the fsck command (6) until you get the first line saying the volume is OK
  8. write: /sbin/mount - uw / this will mount your file system
  9. thats it you are in "Single User"

Enjoy.

 
the menu is from: Milonic DHTML menus